
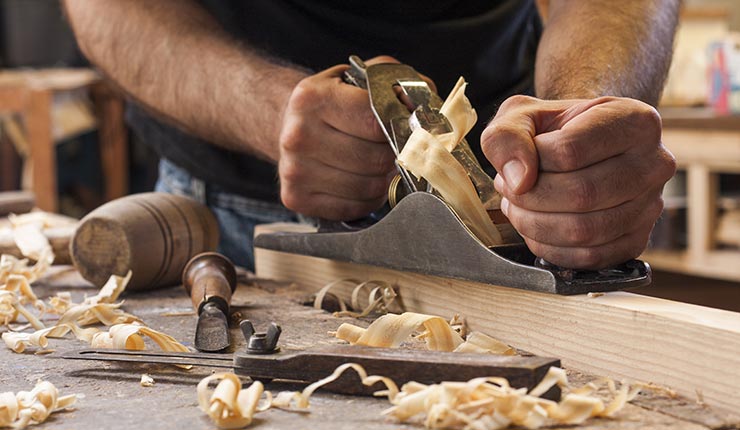
There are many angles that you need to take into consideration when cutting crown molding. These angles include miter, diagonal and spring. It is crucial to know which angle you should use for a perfect fit. Here are some tips for measuring the angles of your crown molding:
A miter angle should be cut
The most efficient way to cut a miter angles when installing crown molding is to use the power saw. To prepare a miter angles, turn the saw 45 degrees to either the left or right. Then, measure the crown molding length from one corner to another. To confirm the exact length, slide a block under the crown. A measuring tape is also an option to verify that the crown molding will fit.

You can cut a bevel angle
The angles are important for proper crown molding installation. Crown molding is standardized in most cases so the angles can be easily determined. There are some factors that you need to consider when cutting bevel angles. The first is the spring angle, or angle between the back of the molding and the wall when it's installed. The most common crown molding angles are 45 and 52 degrees. But, it is possible to find a chart which includes both of these angles.
Cut a diagonal angle
First, lay the crown molding flat on a table. Cut a diagonal line approximately one-half inches from one end. Continue this process until you have cut the entire loaf. Next, create another diagonal angle approximately the same length as the first. Attach the crown molding onto the backer board by using a nailgun. This step is crucial and takes patience.
Calculate a spring angle
The wall area where crown molding will be installed is important to determine the spring angle. You can also check the angle by using a measuring tape. A spring angle describes the angle between the back edge of the crown and the wall during installation. A typical angle for crown molding is either 45deg (or 52deg) A test block can be used to measure the angle of the spring.
Make a miter joint
To make a miter joint in crown molding, follow these steps: - Place the piece of molding on the table. - Place the miter base at the right angle. Place the right-side of the piece on top. - Turn the piece so that it is at the right angle. - Keep the right side of the cut. Set the blade at the highest speed. You should always hold the blade with a firm grip. Ensure that your blade is not in the way of the molding.
Maintain consistency of spring angles
An angle chart (or finder tool) is needed to maintain consistent spring angles in crown molding. An angle chart shows the angles between the crown's rear and the wall where it will be mounted. The typical angles for crown moldings include 45deg/45deg, 52deg/38deg, and 53deg/38deg. If you don't have an angle chart, you can always slide a test block underneath the crown.
FAQ
Are you looking for tips to start a woodworking company?
It can be difficult to start a woodworking shop. It's worth it if you're passionate and willing to work hard. You might even enjoy running your own business.
It is important to remember that unexpected problems may arise when you start a new venture. You might run out money, or you may have to borrow unexpectedly. You might find customers not willing to pay the amount you expected. To survive, you'll need to be prepared for such situations.
Set up a separate account in your bank for your business. This will ensure that you always know how much money has come in.
How does a beginner woodworker earn money?
Many people are looking to create their own furniture and start an internet business. There are other ways to make money if you're just starting out building furniture than selling on Etsy. Sell at craft fairs or other local events. A workshop could also be offered for people who are interested to learn how they can build their own furniture. Perhaps you have some experience as a carpenter/builder and would like to offer your services, such as remodeling homes and creating custom pieces.
What is the difference between plywood and particle board?
Plywood is made up of layers of wood pressed together under pressure. Plywood comes with a range of thicknesses, and it is most commonly used for flooring and cabinets. Particle board is made of sawdust and resin that has been compressed into large blocks. This board is commonly used in home improvement projects. Both types of boards are durable and easy to cut.
What is the difference in a hobbyist and professional woodworker?
Hobbyists are passionate about making things from wood, while professionals tend to be more focused on the quality and craftsmanship of their work. Hobbyists tend to take pride and share their creations with family and friends. Professionals will spend hours researching designs and then begin to create a project. They will pay attention to every detail, from selecting the best materials to finishing the project perfectly.
Where can I purchase woodworking supplies
There are many places where you will find everything that you need. You could shop at your local hardware store or go online to Amazon.com.
You might also consider flea markets and garage sale for any old furniture or other materials you could reuse.
Statistics
- Average lumber prices rose about 600 percent between April 2020 and May 2021. (familyhandyman.com)
- If your lumber isn't as dry as you would like when you purchase it (over 22% in Glen Huey's opinion…probably over 10-15% in my opinion), then it's a good idea to let it acclimate to your workshop for a couple of weeks. (woodandshop.com)
- Most woodworkers agree that lumber moisture needs to be under 10% for building furniture. (woodandshop.com)
- The U.S. Bureau of Labor Statistics (BLS) estimates that the number of jobs for woodworkers will decline by 4% between 2019 and 2029. (indeed.com)
External Links
How To
How to drive a nail through wood
When driving a nail into wood, it is important to first choose the correct size and kind of hammer. The most popular types of hammers include claw hammers as well as mallets and ball peenhammers. Each kind of hammer has its own advantages and disadvantages. A clawhammer works best when hitting something hard like nails. However, it can sometimes be difficult to see exactly where the strike is going. Although a sledgehammer can be used to hit large areas quickly, it is too heavy to be useful for small tasks.
After choosing the right hammer, place your hand flat against the side of the head so that the handle rests comfortably in your palm. Take the handle and hold it with both hands. But don't press down so hard you injure yourself. The hammer should be held straight up with your wrist relaxed. Now, move the hammer towards the center of the nail by swinging it back. You should feel the impact of your hammer hitting the nail. You can practice swinging the hammer with a block or wood until you feel the rhythm.
You can now drive the nail by holding the hammer to your body. Place the nail so that it is perpendicular with the wood's surface. Keep your attention on the tip. Move the hammer forward and then continue to move the hammerhead. This can be repeated several times to increase the speed of your swing. Try adding power to your swings when you've mastered the technique. To make it more powerful, hold the hammer up high to your shoulder and then bring it down. You'll have more energy to work with.
After you have nailed the hole, take the hammer off the nail. To pull out the remaining nails, use a screwdriver or pry bar. To prevent splitting the wood, ensure you keep the nail heads flush against the board's surface.