Before you can tackle the more complicated wood turning projects, there are some essential basics. Start by turning a simple project like a handle to hold a hammer. Beginners can also do a variety of smaller projects to get the hang of the craft. But, more experienced woodworkers can take on more challenging projects after learning the basics. Here are some basic techniques and tools for woodturning.
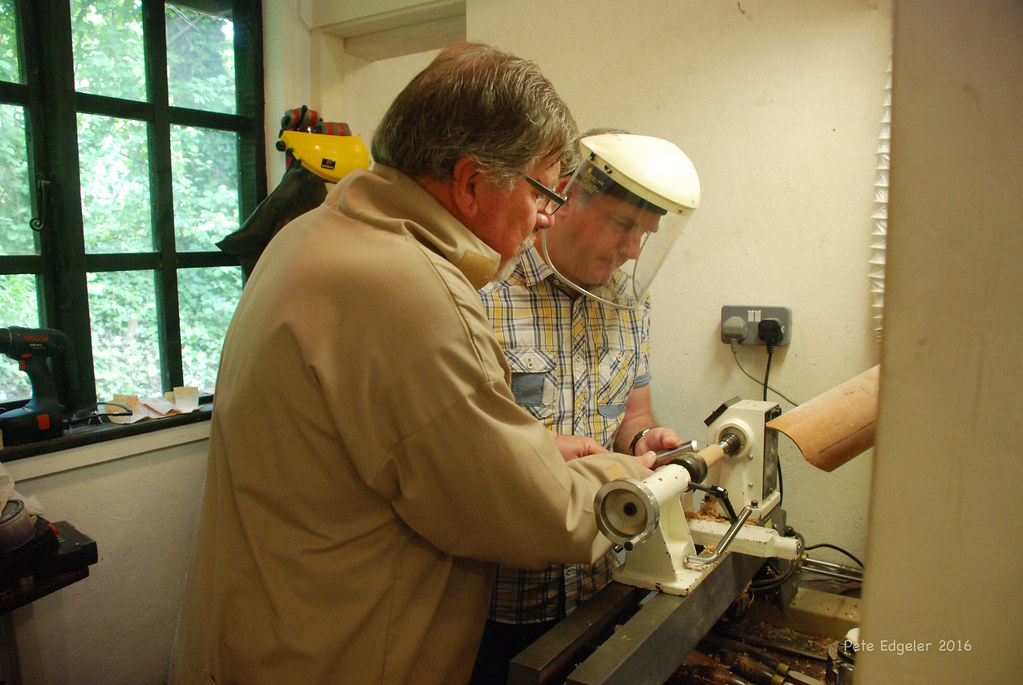
Spindle turning
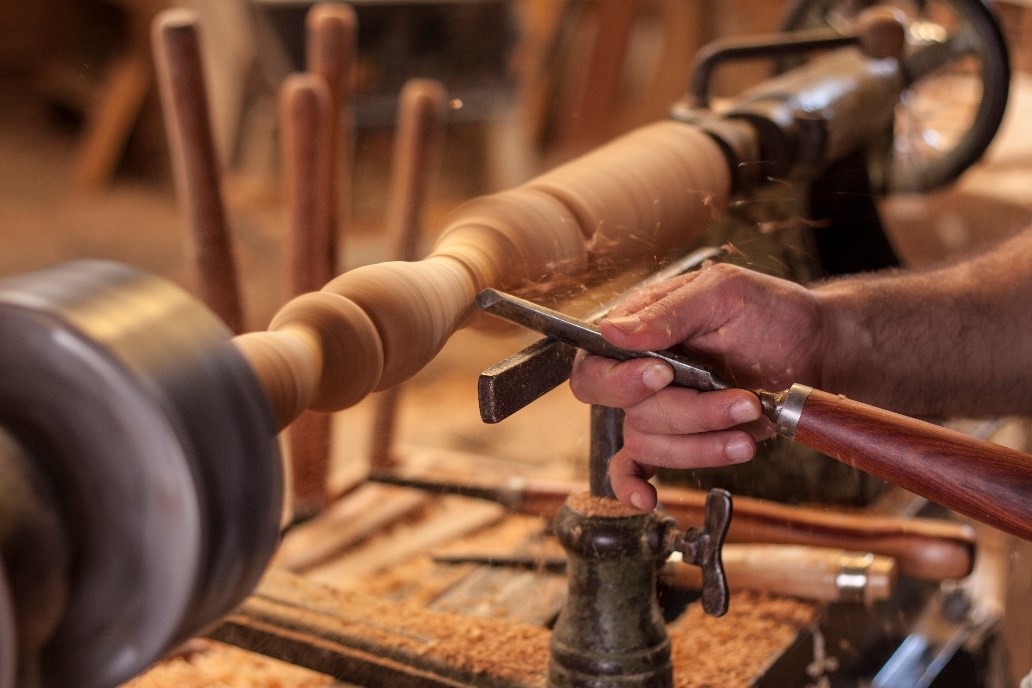
A square blank is the first step in creating a spindle. You can mount the blank between your tailstock and the headstock by using a roughing saw. When the blank has the desired diameter, use a caliper to measure it. Next, using a parting knife, turn the spindle so that it has the desired diameter. You can measure each section with a caliper, and then place the tool rest in each groove until you have reached the desired diameter.
While woodturning is a fun and rewarding hobby, it is important to remember safety as you turn. A variety of techniques are available for spindle manufacturing and safe turning. This knowledge can be used to create a wide range of projects. This article will not cover all aspects of woodturning safety but it will be a great starting point for your project. For more information about safety, consult a professional.
Softwood is a good choice
Wood can be divided into two categories: hardwood and softwood. Hardwoods are ideal for turning, and include maple, oak, and hickory. Softwoods, on the other hand, are suitable for carving. European yew makes excellent bows and instruments. Softwood is better for making furniture. Engineered woods, such as yellow pine, are generally not appropriate for turning operations.
The problem with softwoods is their tendency to retain pitch pockets. This can cause problems for your finished work. Wood pitch can leak from the wood even after it has been air dried. This is why you need to protect clothes and other surfaces from getting stained by wood pitch. It's best to use pre-stain conditioner before applying any stain to softwood. Pre-stain conditioning will penetrate the wood's open fibers and act as a barrier.
Lathe speed limit
Most woodturners agree that the maximum lathe speed should be between 6,600 and 9,000 rpm for a given size. However, there are many things to consider. If the piece is 3 inches in diameter, the speed should be 2,000 RPM. However, a 10 inch work piece would run closer to 600 RPM. A limitation to the speed of a lathe is how much vibration the piece can withstand. It is therefore best to have a lower RPM.
The speed of your lathe should be set to allow you turn blanks without vibration. A low-speed setting may be more suitable if the workpiece is small and needs to be shaped carefully. The work will be smoother if you use a higher speed setting. Try different speeds to find the right speed for your woodturning projects. A smoother finish will generally be achieved at higher speeds.
Tools to Use
Below is a list of some tools you will need for your woodturning project. A skew is a tool with a beveled cutting edge that is used for shaping wood. This tool is able to cut long ribbons of wood out of a piece and is more efficient than other lathe tools for cutting end grain woods. Moreover, a skew chisel is better for creating a smooth and flat surface for turning bowls and spindles.

It is important to invest in quality tools for woodturning projects. It is not a good idea to buy cheap tools as they are less likely to hold their edge. It is important to purchase a sharpening machine, especially for high speed steel. A grinder that is at least 8 inches in diameter will make sharpening your steel easier.
FAQ
How do I know what tools are best suited for me?
When shopping for tools, it helps to think about your needs and preferences. What do you prefer: metal or plastic handles? What size screws and nails do you use most often? Do you prefer hand tools over power tools?
How long does it take for furniture to be finished?
It all depends on what type of wood you use, how complex your design is, and how much finishing you use. For example, hardwoods require more maintenance than softwoods. Hardwoods are also more expensive than softwoods. However, they are stronger and more resistant to moisture. It takes between one and three months to finish a piece.
What kind and type of wood should i use?
There are many wood types that are used in woodworking, including oak, maple and birch. Every type of wood is different and can have a unique look and feel that will affect the final product. Oak, for instance, is darker and harder than most other woods. Birch, which is lighter and soft, is more heavy than mahogany. You also have the option of solid wood or veneers. Veneers are thin sheets or wood that are glued together into one layer.
Statistics
- Most woodworkers agree that lumber moisture needs to be under 10% for building furniture. (woodandshop.com)
- Overall employment of woodworkers is projected to grow 8 percent from 2020 to 2030, about as fast as the average for all occupations. (bls.gov)
- Woodworkers on the lower end of that spectrum, the bottom 10% to be exact, make roughly $24,000 a year, while the top 10% makes $108,000. (zippia.com)
- The U.S. Bureau of Labor Statistics (BLS) estimates that the number of jobs for woodworkers will decline by 4% between 2019 and 2029. (indeed.com)
External Links
How To
How to join hardwood without using nails
Woodworking is a hobby that many people enjoy doing. It's fun and relaxing because you can use your hands to make something useful from wood. Sometimes you may want to join two pieces together of wood without using nails. This article will teach you how to do this to keep your woodwork projects looking great.
First, remove any sharp edges from the wood pieces before you join them. Do not leave any sharp corners as they could cause problems down in the future. Now it's time to start glueing your boards together.
If you're working with hardwood, you should only apply glue to one side. For softwoods like cedar and pine, glue should be applied to both sides. Press the boards down until the glue is fully incorporated. After applying the glue, let dry the boards before proceeding to the next stage.
After you have glued your boards, drill holes where you want to insert screws. The size of these holes depends on what type of screw you choose to use. If you plan to use a 1/2 inch wood screw, drill a hole at least 3/4 inches in depth.
After drilling your holes, drive the screws into the board's backside. Do not hit the boards' front surfaces. It will ruin the finish. Be careful not to drive the screws too hard at the ends. This will avoid splitting in the wood's ends grain.
You'll need to protect your completed project from the elements. You have two options: seal the whole furniture piece or just the top. Either way, you'll want to use a product that will last for years to come. Oil-based varnishes are, among others, polyurethanes shellac, laquer, and other oil-based products.
These products can usually be found at any home improvement store. You should make sure you are getting the right type for the job. Remember that some finishes can be toxic, so you should not use them indoors. So, always wear protective gear when handling them.