Here are some tips if you are interested to exhibit at woodturning fairs. As a beginner, it is best to start small and work your way up. You can make wooden keyrings and storage boxes. Wooden letters can be made as well. These items will sell at craft fairs and galleries. These are some of our most-respected woodturning craft shows.
Making wooden letters
There's something so romantic about crafting your own wooden letters! They are beautiful and can be used to spell sentences and words. And you can use them for any occasion! Here are some suggestions. These personalized greeting cards can be used for birthday celebrations and nursery decor. You can also use them as wall art. Turn a wooden letter from a newborn parent into a nursery wall hang.
The international art of artistic woodturning can be found in almost all countries. Its origins can be traced back in North America to North American artists. In the beginning, all Americans worked with wood. However, traditional apprenticeships declined in the United States. Fortunately, industrial arts training filled the gap. It became an integral part of high-school education and many were influenced.
Making wooden keyrings
There are many ways you can add flair to your wooden keyrings. Whether you want to make a funky or vintage-western-style keychain, you can easily find inspiration and make the item yourself. These keychains can also be great gifts for loved ones. Decorative keyrings make it easy to show your personality or add flair to everyday life. These items are affordable and can be created with creativity.
Depending on the craft fair you plan to attend, you might also want to consider selling these items. If you are looking to make a profit from your wooden keyrings you might consider selling them online or at craft shows. If you're attending a craft fair, you can also sell your wooden keyrings at an online marketplace such as Etsy. To make sure you have enough product for the show, you need to know how much stock to order.
Making wooden storage boxes
One of the most inexpensive projects you can do to make wooden storage boxes is to have a booth at a woodturning fair. These boxes can be used for storage, as well as decorative purposes. For jewelry storage or decorative shelving, you can make wooden boxes. Here are some ideas for creating wooden storage boxes.
Making wooden chopping boards
Wooden chopping boards are a great option if you intend to sell your finished items at a woodturning crafts fair. The process is quick and easy, and the boards can double as promotional corporate gift. They can be personalized with engravings, customer names and business logos. These boards can be listed on Etsy and even sold at the craft show.
Once you've turned the first board, apply a bead of glue along one side. Next, attach the middle piece of the wood to the right-hand side of the first board. Once you've done this, make sure that the edges are lined up. Next, use a hand-sander to sand the flat sides. Next, finish your edges with a router that has a roundover or chamfer bit.
Selling at woodturning craft fairs
It is important that you understand the rules and regulations that apply to woodturning crafts in order to sell your turntables at craft fairs. To be eligible for these events you must register with Pacific Northwest Woodturning Guild. The guild certifies members' work to ensure they are upholding a high standard. To draw attention to their work, certified members can use PNWG's certification symbol in marketing materials. You can also search for its members online or in the Pacific Northwest.
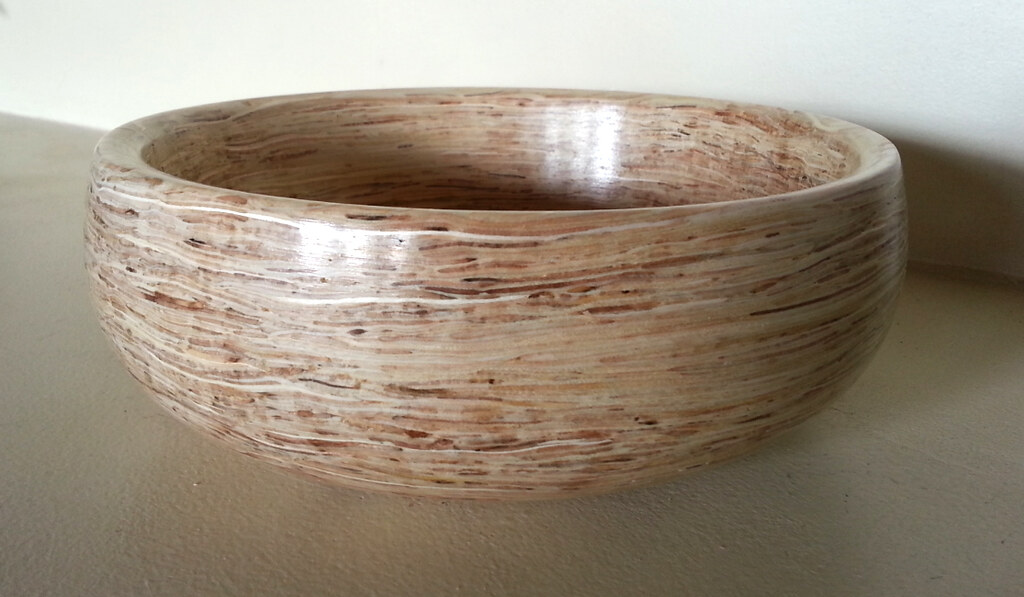
When you first start out, pricing your products can be tricky. For an accurate idea of your product's price, it is worth visiting similar booths. Because it's not small, a turned bowl for instance, will be priced based on its size. Prices must take into account both the time taken to make each item as well as the uniqueness or design. Print descriptions of your products will help customers understand their price tags and what they can expect from you.
FAQ
Do you know anything more about woodworking?
It's easy to underestimate the amount of work involved in making furniture. The hardest part of the process is actually finding the right wood. There are so many varieties of wood available that choosing one can be difficult.
The problem with wood is that not all wood properties are the same. Some woods will warp and others will split or crack. These things should be considered before you buy wood.
Do I have to refinish my furniture?
Yes! There are many options for refinishing furniture that you don't need to hire a professional. Here are some suggestions:
Use sandpaper for removing stains and scratches. Use a clean cloth to wipe the surface.
Apply clear polyurethane paint. Allow to dry thoroughly before moving furniture.
Paint furniture with acrylic paint.
You can stain the furniture instead of using paint. The stain will give the furniture a rich look.
Use shellac wax. This will protect and shine the wood.
What amount of money do I need to get started with my business?
Since every project differs, it is impossible to give exact numbers. These are the factors that will give you an idea of how much you'll need.
-
Cost of materials
-
Tools and equipment
-
Time spent on the Project
-
The hourly rate
-
How much profit can you anticipate to make
-
You can hire help, regardless of whether you have a plan.
Start small, if possible. You can make simple boxes or picture frames if you're just getting started. As you gain more experience, you will be able tackle more complicated projects.
Can I succeed in woodworking if I'm a genius?
No. Woodworking does not require any special skills. It is possible to learn basic tools and techniques that will allow you to create beautiful art.
Statistics
- Most woodworkers agree that lumber moisture needs to be under 10% for building furniture. (woodandshop.com)
- In 2014, there were just over 237,000 jobs for all woodworkers, with other wood product manufacturing employing 23 percent; wood kitchen cabinets and countertop manufacturing employing 21 percent. (theartcareerproject.com)
- If your lumber isn't as dry as you would like when you purchase it (over 22% in Glen Huey's opinion…probably over 10-15% in my opinion), then it's a good idea to let it acclimate to your workshop for a couple of weeks. (woodandshop.com)
- The best-paid 10 percent make $76,000, while the lowest-paid 10 percent make $34,000. (zippia.com)
External Links
How To
Tips on how to drive a nail in wood
When driving a nail into wood, it is important to first choose the correct size and kind of hammer. The most commonly used types of Hammers are claw hammers. Each type of tool has its advantages and drawbacks. A clawhammer works best when hitting something hard like nails. However, it can sometimes be difficult to see exactly where the strike is going. A sledgehammer allows you to hit large areas simultaneously, but it is too heavy and cumbersome to use for small tasks.
After choosing the right hammer, place your hand flat against the side of the head so that the handle rests comfortably in your palm. Grip the handle firmly, but don't squeeze it so tightly that you hurt yourself. Your wrist should be relaxed while you hold the hammer straight upwards. You should then swing the hammer straight up, keeping your wrist relaxed. You should feel the impact from the hammer striking a nail. Try swinging a hammer using a block wood to practice until you are comfortable.
Once you are ready to drive the nail, place the hammer close to your body. The nail should be perpendicular to wood's surface. Keep your eyes on the tip. Swing the hammer forward, and then move the hammerhead. Repeat this action several times, gradually increasing the speed of the swing. When you are confident with the technique, add power to your swings. Then, raise the hammer from your shoulder to bring it down. This way, you'll be able to put more energy behind your blows.
Once you have successfully drilled the first hole in the nail, remove the hammer. To pull out the remaining nails, use a screwdriver or pry bar. To prevent splitting the wood, ensure you keep the nail heads flush against the board's surface.