Use watercolor paint to bring color to your wood carvings. The paint absorbs into the wood, showing the wood grain. There are two options for watercolor paint: cakes or tubes. The cakes are thicker so they are less likely to drip. Remember that water-based colors can be affected if they are in contact with dust or wood shavings. If you don't have time to paint, apply a thin coat of primer.
Oil-based paints
If you are planning on painting a wood carving, you should know that oil-based paints can be used as a surface. Certain woods are better suited to oil-based paints like maple and birch wood. Avoid oil-based oils if you are painting kitchen utensils. Oil-based paints are also good for wood carvings.
Watercolors
Watercolour painting wood with watercolour paints is a great way to express yourself creatively while keeping the wood's integrity. Watercolors don't warp at all. They do require some preparation. Although sandpaper can be useful, it is best to use a finer grit for the center of your wood carving. This will make the watercolor pigments pop out of the wood, and the wood will frame them. You should use protective eyewear as well as a dust-removal device to ensure safety.
Gesso
Preparing the piece is necessary before you can paint your wood carvings. Either the artist or student grade gesso can be used. The student grade is generally white, while the artist grade is darker. Acrylic paint can be added to more pigmented colors. Combine gesso and painting to get the desired color. Apply several thin coats to the paint after the gesso has dried.
Acrylic paints
If you're interested in creating beautiful pieces of art from wood, acrylic paints are a great choice for woodcarving projects. These paints are non-toxic and durable, and they stick to several types of wood exteriors. Plus, they're non-toxic. They are also ACMI certified, which makes them ideal for people with sensitive skin. These are some tips to help you choose acrylic paints to paint woodcarvings.
Oil-based paints mixed in gesso
Gesso consists of whiting mixed with animal glues. It is often white, but it can also be found in black, colored and transparent versions. The type of gesso you choose will determine the consistency. Some brands will apply smoothly, while others will leave a toothy finish. You can try different types of gesso until you find your preferred consistency. Liquitex Super Heavy Gesso would be a great choice to add sculptural effects to a canvas. Use a palette knife to apply it.
Basswood panel
Make sure to seal your panel of basswood before you apply the paint. Wood's natural substances can lead to paint deterioration. Sealers protect the wood's pores from paint penetration by making the surface smoother and more uniform. Properly sealing the wood will improve its durability. These are the best ways to seal your basswood panel. The right sealer is needed for your basswood panels.
Sealing coats
Use a sealer to protect wood carvings. Follow the instructions. Use a paintbrush or a sponge to apply the sealer evenly over the entire surface. Let the sealer dry completely in an open area before applying the next coat. You can sand lightly the carving after the sealer has dried to remove any excess coating. If you have a very fine carving, skip this step.
Using gesso
Make sure you prepare your wooden carvings by applying gesso on both the front- and back surfaces before you paint. This substance is often thinner than student-grade gesso, so it will absorb more paint. You can mix it with acrylic paint for greater pigmentation, but it's not necessary. The thickness of the gesso is dependent on the amount of paint you plan to use.
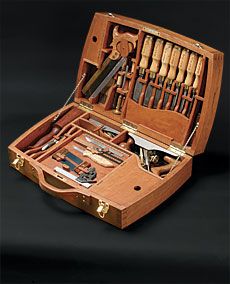
Chosening a wood
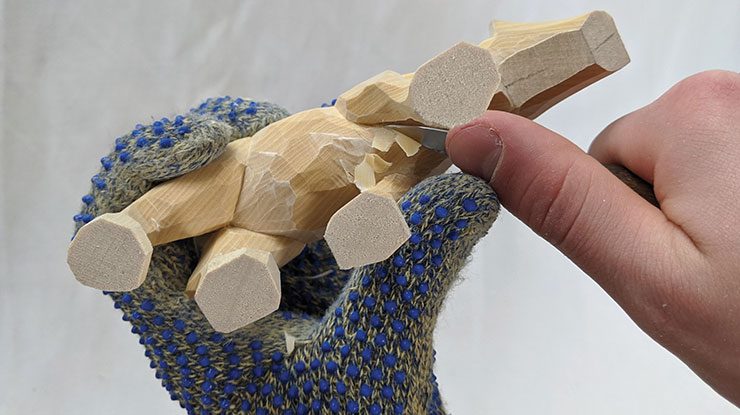
It is essential to choose the correct wood for painting wood carvings. The paint can change the physical dimensions. Choose a lighter, neutral wood to allow you to paint over and highlight dark tones. If the wood is dark enough, you can cover it with a darker paint. It doesn't matter if the wood is to be painted whole or in parts, a neutral tone will do.
Pre-treatments
Many wood carvings come with the ability to be colored or painted. These works require pretreatment to stop oils and water from seeping into the wood. This is especially true with softwoods like basswood that are highly absorbent. Wood carvings can also be painted using a special wood paint. But, to avoid issues, there are some things you need to know. This article will describe how to pretreat wood.
FAQ
What is the difference between a hobbyist woodworker and a professional woodworker.
Hobbyists are passionate about making things from wood, while professionals tend to be more focused on the quality and craftsmanship of their work. Hobbyists are proud of their creations and will often share them with family members and friends. Before they start working on a project, professionals will spend hours researching the designs. They'll be meticulous about every aspect of their work, from choosing the best materials to finishing it perfectly.
What kind of wood should you use?
Oak, maple, cherry and mahogany are the most common wood types used for woodworking. Each type of wood has unique characteristics that affect the look and feel of the final product. For example, oak tends to be darker and harder than other woods. Birch is lightweight and soft while mahogany is heavier and denser. You can also choose between solid wood and veneers. Veneers are thin sheets of wood that are glued together to form a single layer.
Where can I begin with woodworking
It is best to actually build furniture to learn how to make it. You will need tools. There are bound to be mistakes. But if your persistence is consistent, you will soon master the craft.
Choose a project that interests you. It can be something as simple and small as a box, or large-scale as an entertainment center. Once you've decided on a project, find a local woodworker who specializes in that kind of work. Ask him or her for advice on what tools you'll need and where to find them. It's possible to ask your friend if they do this type of work.
Which wooden products are most popular?
Wood that has been harvested sustainably is the best-selling type of wood.
Oak, cherry and mahogany are the most sought-after wood types for furniture.
These woods not only have great strength, but also beautiful patterns and colors. They are also very durable if properly maintained.
To protect wood furniture from moisture damage, it should be painted first. All surfaces should be painted, including doors, drawers, and handles.
If you want to make sure that your furniture lasts as long as possible, then you should choose a paint that is resistant to water.
You should use a high-quality oil-based primer followed by two coats of top coat. You may need to apply several coats of top coat depending on how much wear it is expected.
Spray cans or aerosol paints should be avoided. These products contain solvents that evaporate quickly and leave behind harmful fumes.
Where can I find free woodworking plans?
Woodworking plans can be found online without the need to purchase books or magazines. You just need to search Google. Simply type "free woodworking” into the search box and you'll find hundreds of websites that offer free plans.
How do I know what type of wood I'm dealing with?
Always verify the label on wood purchases. The label should include information about the wood species and its moisture content as well as whether or not it has been treated using preservatives.
Is it possible to refinish your own furniture?
Yes! There are plenty of ways to refinish old pieces of furniture without having to pay a pro. Here are a few ideas:
Use sandpaper on the surface to remove any stains or scratches. Use a clean cloth to wipe the surface.
Apply clear polyurethane finish. Allow furniture to dry completely before you move it around.
Paint furniture with acrylic paint.
Instead of using paint, stain is a better choice. You can give your furniture a rich appearance with stain.
Apply shellac wax. Applying wax will give the wood shine and protection.
Statistics
- Average lumber prices rose about 600 percent between April 2020 and May 2021. (familyhandyman.com)
- If your lumber isn't as dry as you would like when you purchase it (over 22% in Glen Huey's opinion…probably over 10-15% in my opinion), then it's a good idea to let it acclimate to your workshop for a couple of weeks. (woodandshop.com)
- The best-paid 10 percent make $76,000, while the lowest-paid 10 percent make $34,000. (zippia.com)
- Woodworkers on the lower end of that spectrum, the bottom 10% to be exact, make roughly $24,000 a year, while the top 10% makes $108,000. (zippia.com)
External Links
How To
How to drive a nail through wood
First, choose the right size and type of tool to drive a nail through wood. The most popular types of hammers include claw hammers as well as mallets and ball peenhammers. Each type of hammer comes with its advantages and disadvantages. A clawhammer works best when hitting something hard like nails. However, it can sometimes be difficult to see exactly where the strike is going. A sledgehammer is great for hitting large areas at once, but it's too heavy to use effectively for smaller tasks.
After you've chosen the right tool, hold your hand flat to the handle so it rests comfortably in one of your palms. Take the handle and hold it with both hands. But don't press down so hard you injure yourself. Hold the hammer straight up, keeping your wrist relaxed. You should then swing the hammer straight up, keeping your wrist relaxed. You should feel the impact on the nail from the hammer. If you're having trouble getting the hang of swinging a hammer, practice with a block of wood until you get the rhythm down.
The hammer should be held close to your body when you are ready to begin driving the nail. You will need to position the nail so it is parallel to the wood. Keep your attention on the tip. Move the hammer forward and then continue to move the hammerhead. Continue this motion several times, slowly increasing the speed of each swing. Once you have mastered this technique, increase the power of your swings. You can hold the hammer over your shoulder and forcefully bring it down. This way, you'll be able to put more energy behind your blows.
Once you have successfully drilled the first hole in the nail, remove the hammer. The rest of the nails can be pulled out using a screwdriver, pry bar, or a hammer. Keep the nails heads in line with the surface of the board to prevent splitting the wood.