
This guide will assist you in creating intarsia wooden art. This guide covers wood types, patterns, tools, and techniques. Continue reading to learn more about this fascinating craft. You might want to try different wood types depending on your skill level. For those who are just starting out in this craft, it is a good idea to make a sample.
Patterns
You can make intarsia ornaments for holiday, Christmas, and tree occasions if you're a good woodworker. These intarsia patterns are for all skill levels. They also showcase the beauty of the process. 21 full-size Intarsia Patterns are included. There is also helpful information regarding shaping, wood and blades.
Using contrasting wood species, intarsia is an exciting and original way to build a piece of furniture or an artistic wall hanging. It's like building a puzzle, with different pieces of wood arranged next to each other. The wood is then stained or polished and each piece is then assembled to give the project depth and character. You will be able to make intarsia wooden patterns, but they can be very difficult to make.
Tools
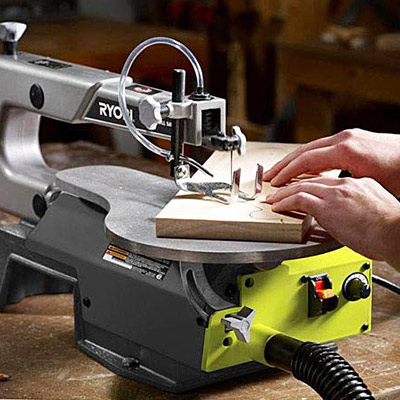
To create the best intarsia, you will need to use special tools for intarsia wood. A small belt grinder is a good tool to quickly remove materials and smoothen the edges. A dremel and flex shaft are useful tools to shape or sand small details. There are many options for these tools, including different blades and tools that can be used to shape and sand small areas.

Jigsaws: Jigsaws are great at cutting wood, but they cannot do the intricate cuts that scrollsaws can. Sanders are required to smoothen wood surfaces. Two types of wood are required for intarsia woodworking. They must have different colors and grains. The wood will then have a different color. Once the wood has been cut it will be sanded to make a mosaic-like design.
Techniques
Creating stunning intarsia pieces is not as difficult as it looks, as long as you follow the right techniques. A pattern is an excellent starting point for your artistic creativity. With these ideas, you'll be well on your way to creating a stunning piece of intarsia wood art. Here are some methods:
First, select the project design. Keep extra copies of your template. Next, choose the species of wood you're going to use. Different wood species are different. The best way to give your project depth and dimension is to roughen out the wood's thickness. You can also add pieces by glueing on additional layers of wooden. End your project by removing any backing and leaving the fully finished Intarsia piece.
Woods to Use
No matter whether you are just starting out with inlaid wooden work or have been doing it for years, this book will teach you how to create beautiful pieces that stand apart. Kathy's progressive teaching style will help you learn everything, from the basics to the subtleties of color breaks. This book will be an invaluable resource for anyone who is interested in learning more about this fascinating craft, even if they have never attempted it before.
First, select woods that will complement each other and have the same grain orientation. A teddy for example requires 20 pieces of wood made from four different types of wood, each with a slightly different grain. This means you'll need a saw with a high-speed blade. Once you have established the wood's color and orientation, it's time to start cutting and staining.
Colors
The colors of intarsia wood are as varied as the pieces themselves. Heartwoods are reddish brown or gray black, while saps are white. Some woods darken with age, like cherry. Cherry's initial tone is light, but it becomes medium-colored when exposed in the sun. Cedar and other woods can have different tones within a board. This creates depth for your project.
Intarsia can be described as a form of art that involves gluing different pieces of wood together to make patterns. Although it originated in the Islamic world and is now associated with Italy, it has been a popular art form for many years. Woodworkers create a three-dimensional illusion by using different wood colors with varying thicknesses. Intarsia is often used on jewelry boxes as well as wooden chests and keepake boxes.
This can be a tedious process.
Intarsia requires a variety of staining and wood types. Intarsia artists need to have different types of wood and different stains in order create beautiful patterns. There are two types of wood that are most commonly used: plywood and birch. But there are many other options. Artists have the freedom to choose which wood they like. Many craftsmen prefer Western Red Cedar to create intarsia projects.
The first step in intarsia woodworking is to cut and label the pieces of the inlay. The artist then glues the pieces together. Once the glue has dried, the woodworker finishes the piece as with a double bevel inlay. This process is time-consuming and requires a lot skill. However, the final product is truly an art piece.
FAQ
What's the time taken to finish a piece furniture?
It depends on the size of the piece of furniture. You can finish smaller projects, such as boxes or picture frames, in one day. Larger projects such as tables and desks can take several days to complete. It takes time to properly stain and seal wood.
What kind of tools are used to carpenters?
Carpenters use a hammer as their most common tool. A hammer is useful for driving nails into wood. It is also used to help hold pieces together while working on a job. Other tools include clamps.
Is there anything else I should know about woodworking?
It is easy for people to overlook the work involved in furniture making. Finding the right wood is the hardest part. It is difficult to choose between the various types of wood.
Another issue is that wood does not have the same properties. Wooden can split or crack, while some woods may warp. These factors should be taken into account before buying wood.
Statistics
- In 2014, there were just over 237,000 jobs for all woodworkers, with other wood product manufacturing employing 23 percent; wood kitchen cabinets and countertop manufacturing employing 21 percent. (theartcareerproject.com)
- Most woodworkers agree that lumber moisture needs to be under 10% for building furniture. (woodandshop.com)
- Overall employment of woodworkers is projected to grow 8 percent from 2020 to 2030, about as fast as the average for all occupations. (bls.gov)
- Average lumber prices rose about 600 percent between April 2020 and May 2021. (familyhandyman.com)
External Links
How To
Tips for driving a nail in wood
To drive a nail into wood, the first step is to select the right size and type hammer. The most common types of hammers are claw hammers, sledgehammers, mallets, ball peen hammers, and hatchets. Each type has its strengths and weaknesses. A clawhammer works best when hitting something hard like nails. However, it can sometimes be difficult to see exactly where the strike is going. A sledgehammer allows you to hit large areas simultaneously, but it is too heavy and cumbersome to use for small tasks.
Place your hand flat on the side of your chosen hammer so that the handle rests in your palm. You can grip the handle with your fingers, but not so tight that it causes injury. Your wrist should be relaxed while you hold the hammer straight upwards. Then swing the hammer back toward the ground, aiming for the center of the nail. You should feel the impact from the hammer striking a nail. Try practicing with a block to help you master the art of swinging a stick.
When you're ready to start driving the nail, hold the hammer in front of you close to your body. You will need to position the nail so it is parallel to the wood. Keep your eyes on the tip. Then, swing the hammer forward. Next, follow the motion of your hammerhead. Continue this motion several times, slowly increasing the speed of each swing. When you are confident with the technique, add power to your swings. Hold the hammer high above your shoulders and pull it down. This will allow you to exert more energy.
Once you've made the first nail hole, take out the hammer. Use a pry bar or screwdriver to pull out the rest of the nails. Keep the nail heads parallel to the board's surfaces in order to avoid splitting wood.